Generate ABM Project from Template Form
The workflow proposed by this system relies on the utilization of Gradle for dependency injection and management. Thus, to alleviate the burden from the user of initializing a Gradle project with all the needed libraries and structure, the MiniReal system has a page and service dedicated for project generation tailored to each user's need.
Generate & Download ABM Project
-
The first step to getting started is to log in to the MiniReal webservice and navigate to the
Create Modelpage. This can be done by clicking on theStarteroption on the navigation bar and selectingCreate Model.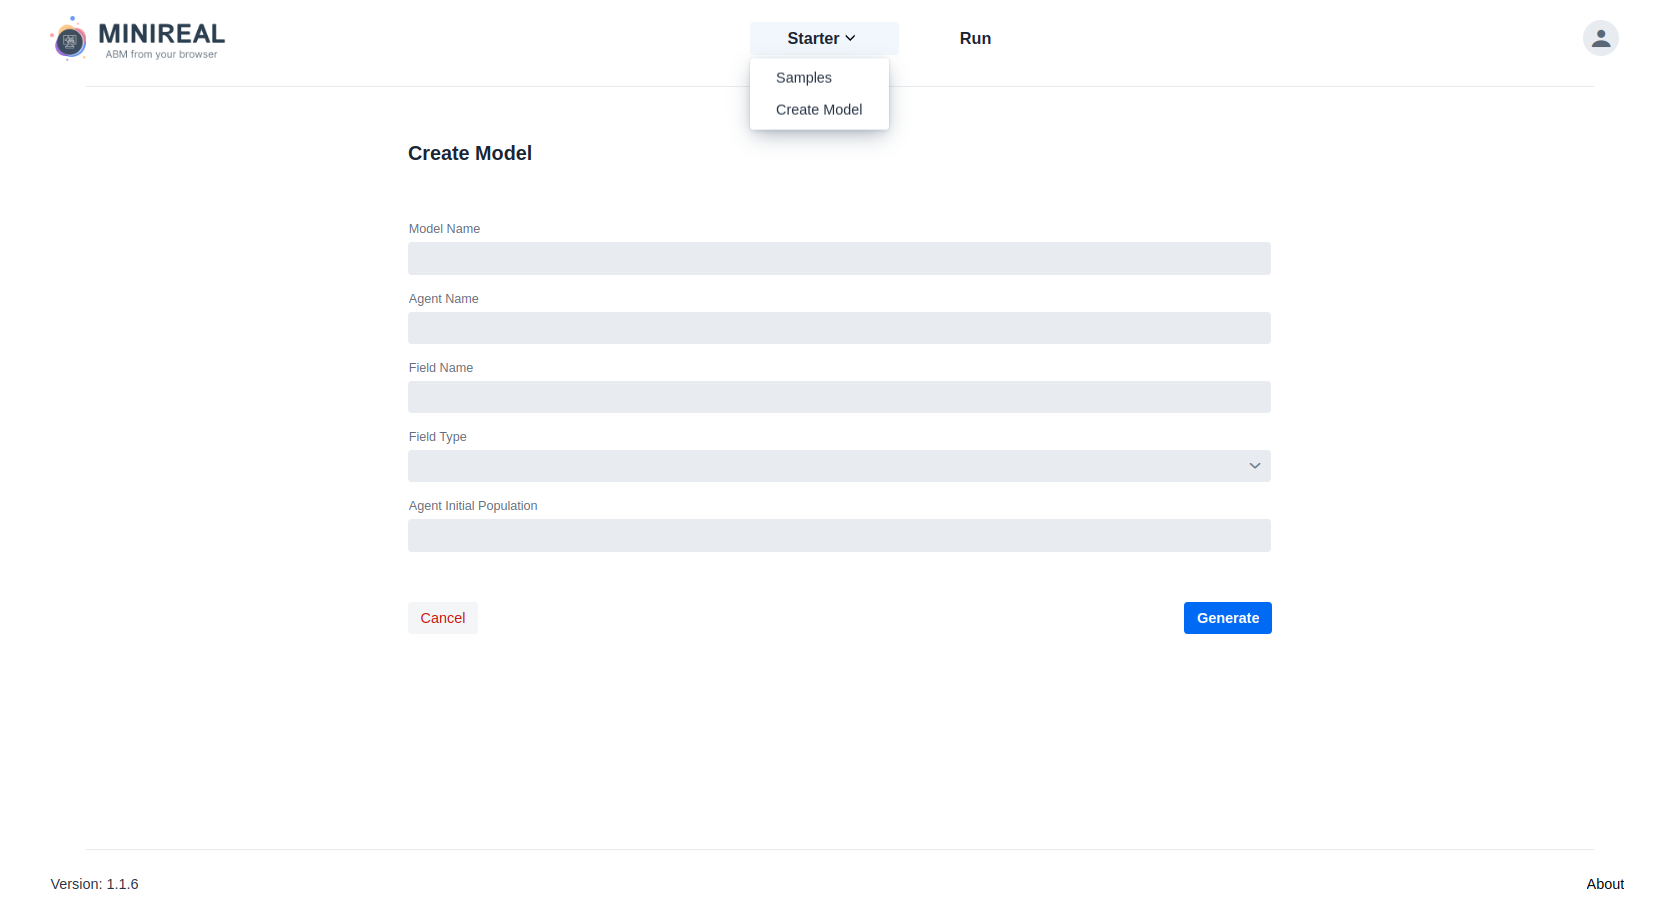
-
The next step is to fill the form properly .
- The
Model Name,Agent Name, andField Namefields can be filled with any valid Java variable identifier name. - The
Field Typegives three options for the simulation space that will hold the agents. These options are:Bag,Grid2D, andContinous3D. These fields are specific and suited to MASON. If the user wishes to use other model space types, that is possible to achieve by changing them after downloading the template project. - The
Agent Initial Populationfield accepts Integer numbers for the size of the agent population.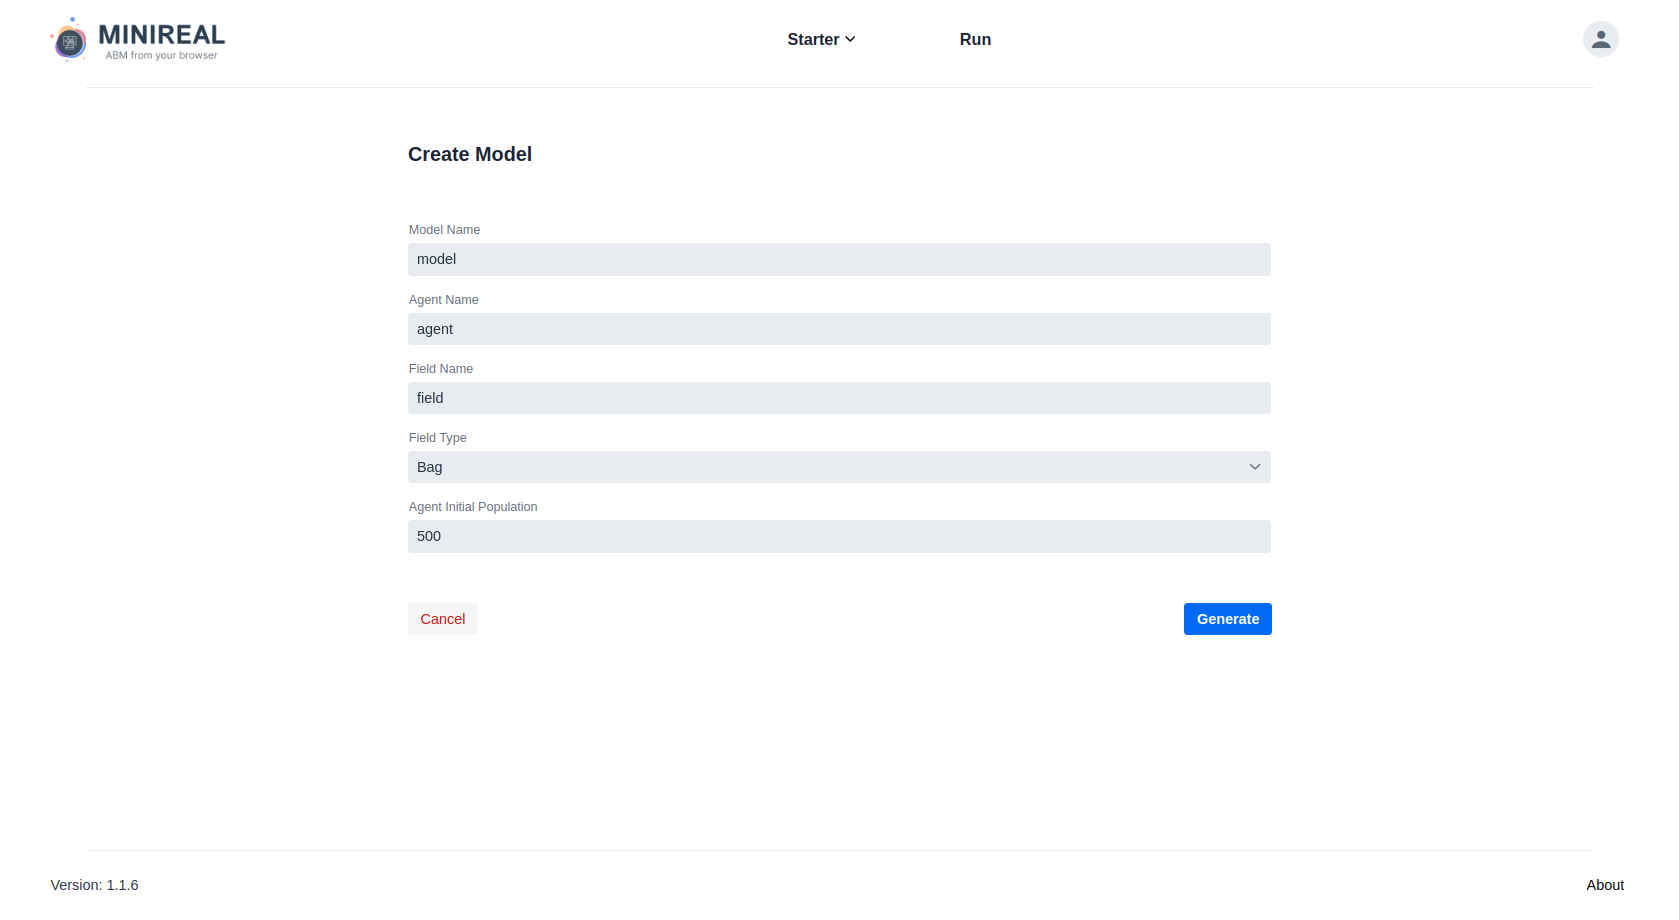
- The
-
After filling the form, click on the
Generatebutton and wait for the ABM Project generation process to finish. The user then can obtain a zipped (compressed) file of the generated model by clicking on theDownloadbutton.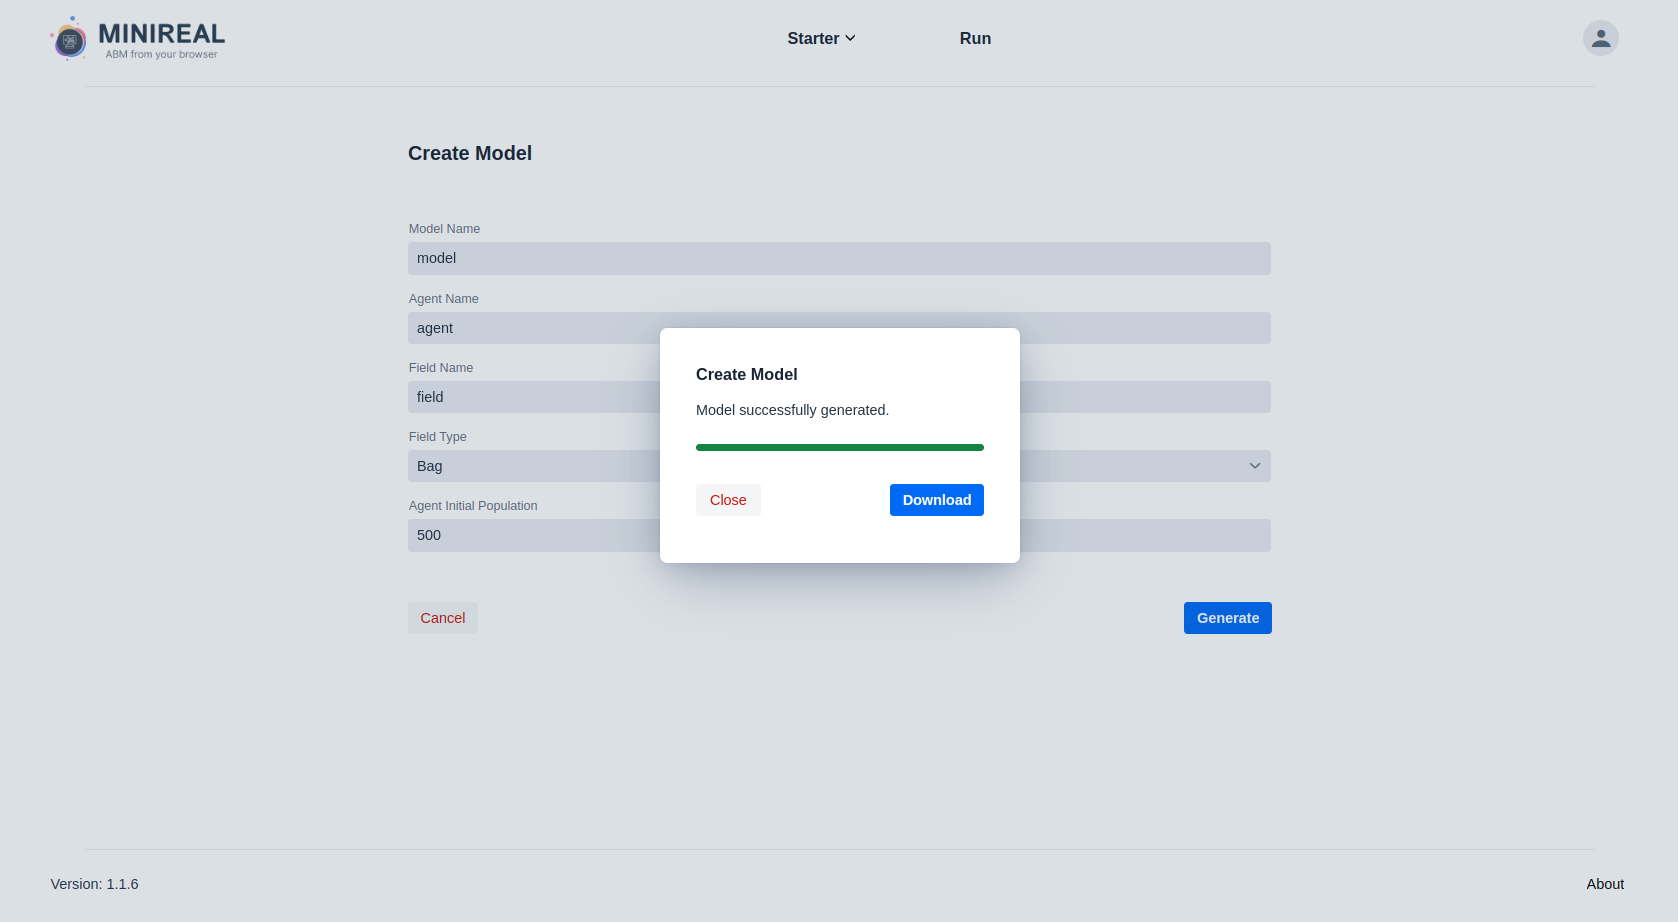
ABM modeling in Local environment
Once the generated model is downloaded, it can be extracted and opened in Intellij Idea IDE.
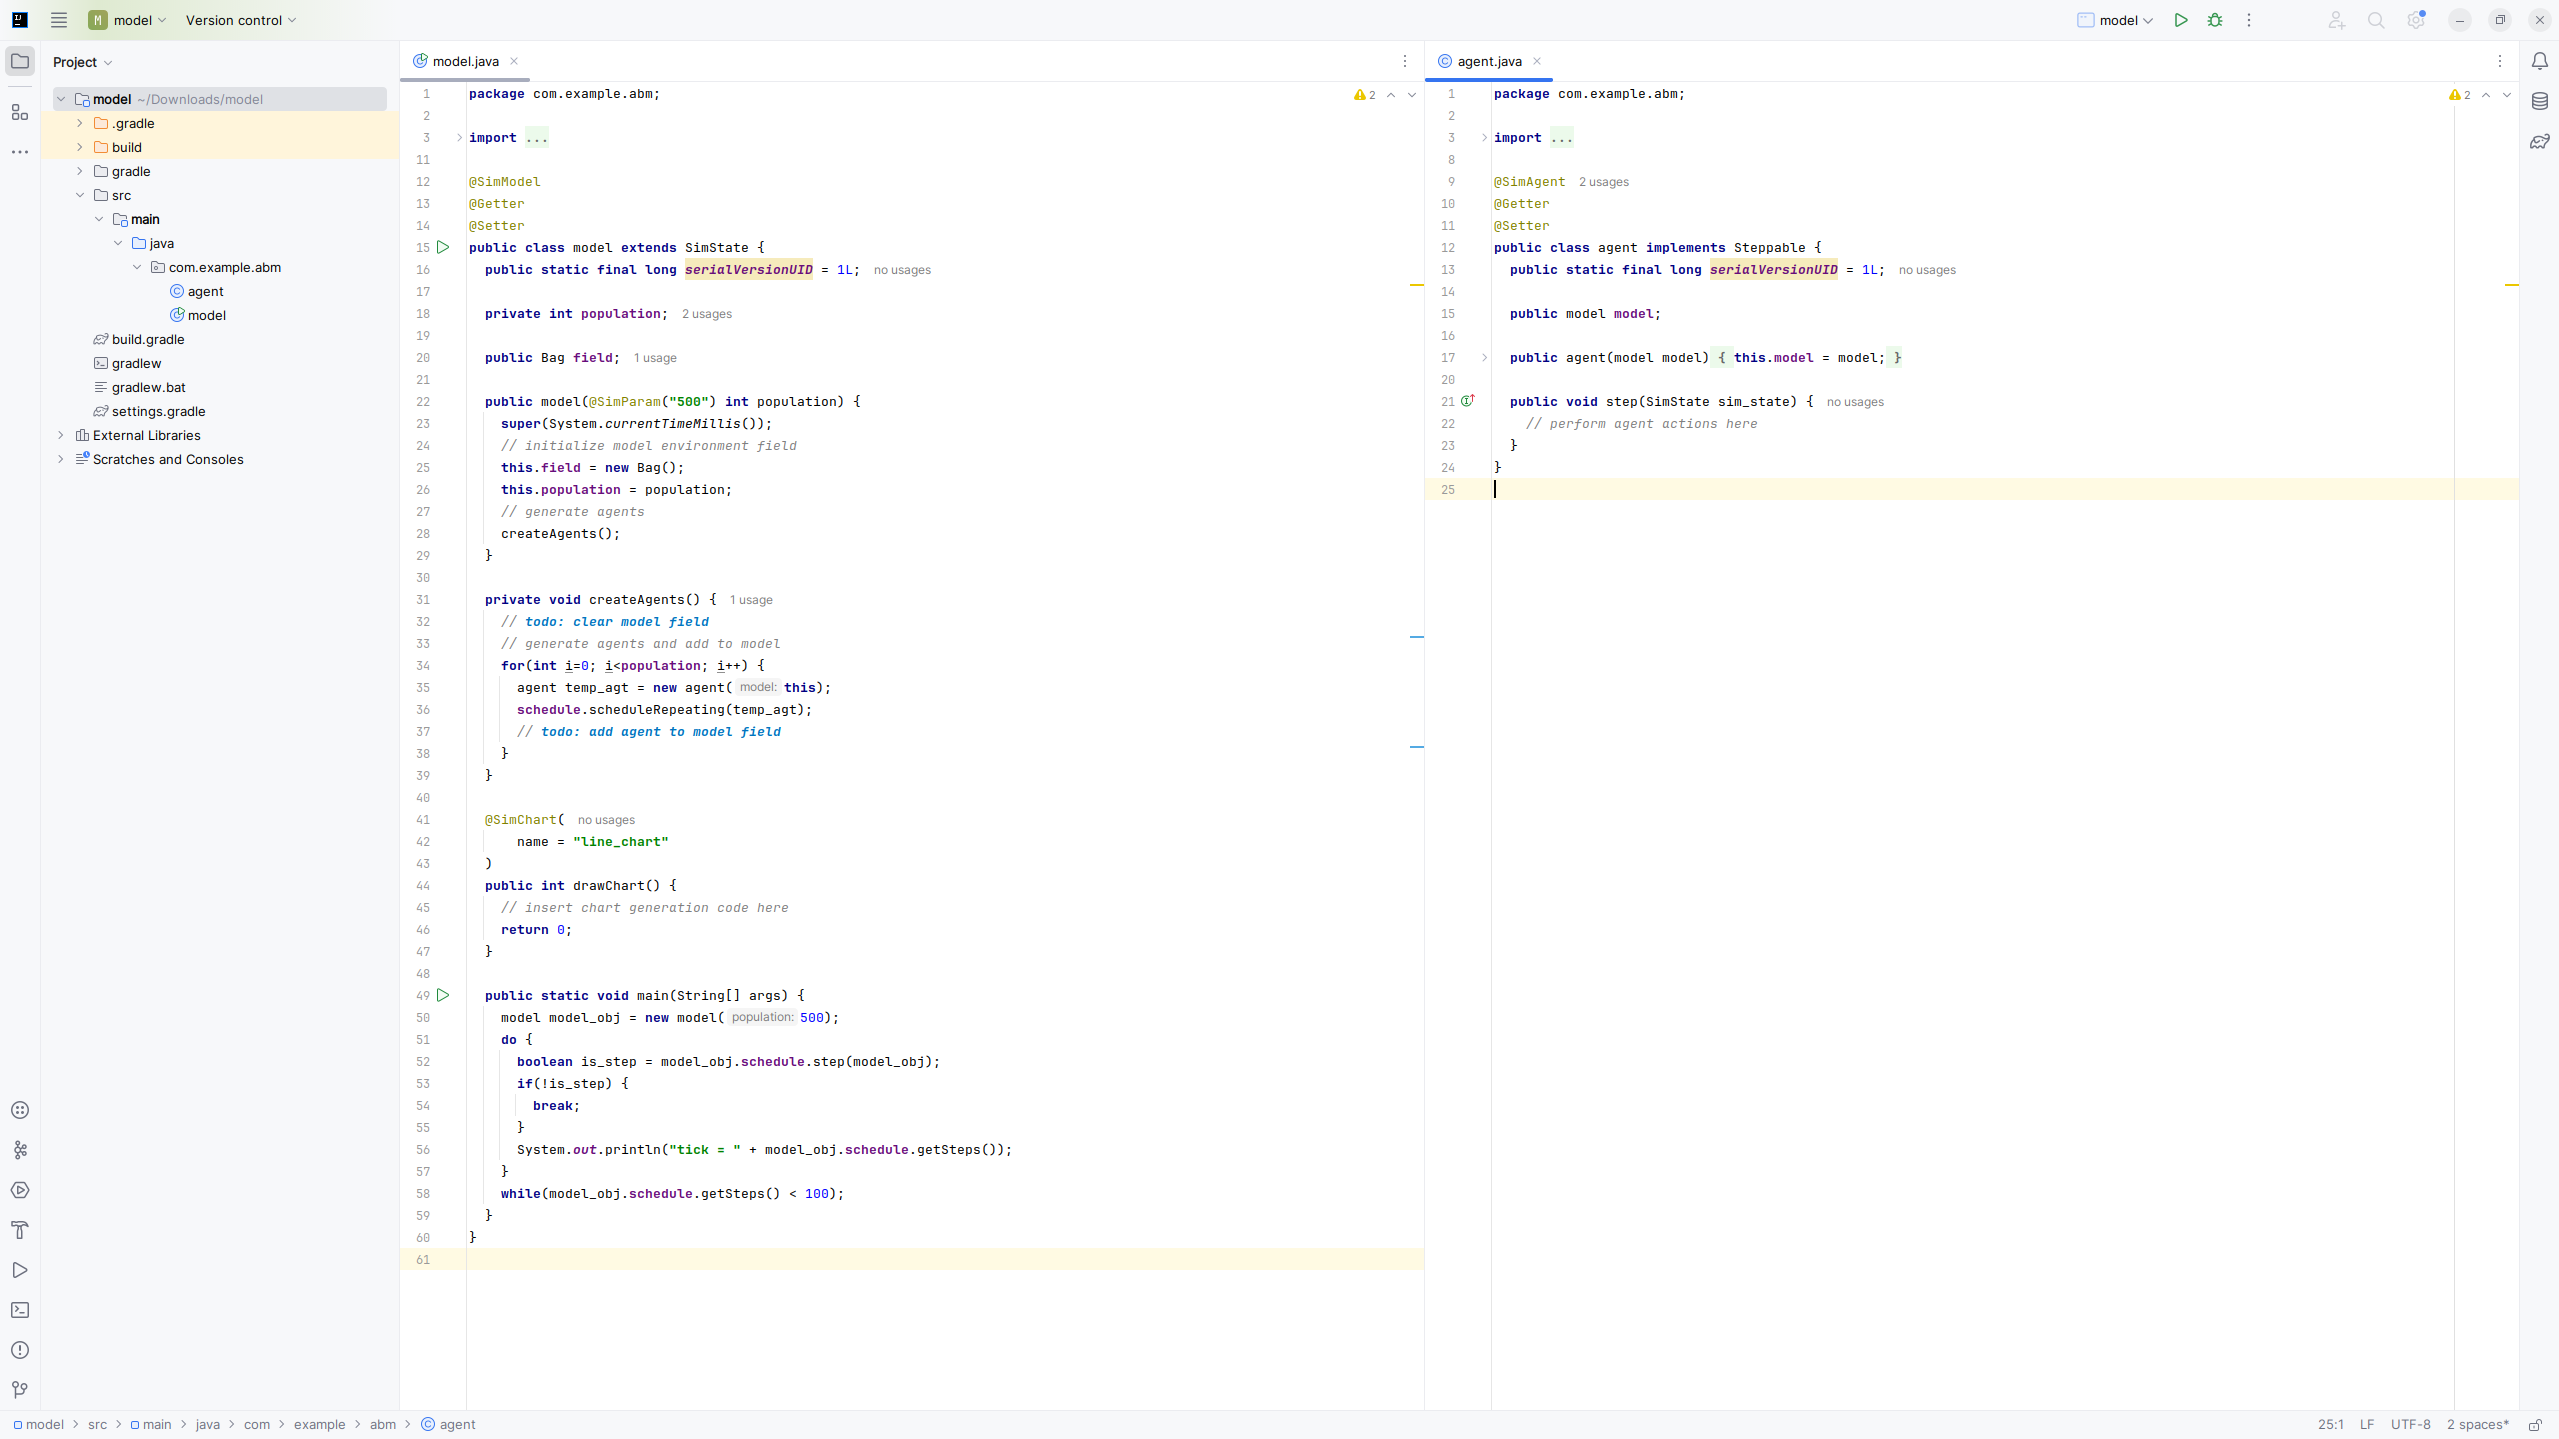
The above image shows the structure of Template ABM code-base obtained from the MiniReal system.
- On the left is the
Modelclass code and on the right is theAgentclass code. - It shows the placement and usage of all the MiniReal Annotations.
- The
createAgentmethod in themodelclass is placed to guide the user populate agents as needed. - The
drawChartmethod is where the appropriate value for the charting is provided. The name of the method can be changed, however the usage ofSimChartannotation is required. - The model parameters can be defined as the parameters of the class constructor and annotated with
SimParamAnnotation. - The
mainmethod in themodelclass can be used to run and test the model on a local environment to ensure the correct implementation of it. After downloading and opening the generated model for the first time, users can run themainmethod to check if everything is working well. - The
stepmethod in theagentclass is where the behaviours or actions of Agents is placed.
Happy Modeling!